Learning CenterWhat is a mineral?The most common minerals on earthInformation for EducatorsMindat ArticlesThe ElementsThe Rock H. Currier Digital LibraryGeologic Time
搜索矿物的性质搜索矿物的化学Advanced Locality Search随意显示任何一 种矿物Random Locality使用minID搜索邻近产地Search Articles搜索词汇表更多搜索选项
╳Discussions
💬 Home🔎 Search📅 LatestGroups
EducationOpen discussion area.Fakes & FraudsOpen discussion area.Field CollectingOpen discussion area.FossilsOpen discussion area.Gems and GemologyOpen discussion area.GeneralOpen discussion area.How to ContributeOpen discussion area.Identity HelpOpen discussion area.Improving Mindat.orgOpen discussion area.LocalitiesOpen discussion area.Lost and Stolen SpecimensOpen discussion area.MarketplaceOpen discussion area.MeteoritesOpen discussion area.Mindat ProductsOpen discussion area.Mineral ExchangesOpen discussion area.Mineral PhotographyOpen discussion area.Mineral ShowsOpen discussion area.Mineralogical ClassificationOpen discussion area.Mineralogy CourseOpen discussion area.MineralsOpen discussion area.Minerals and MuseumsOpen discussion area.PhotosOpen discussion area.Techniques for CollectorsOpen discussion area.The Rock H. Currier Digital LibraryOpen discussion area.UV MineralsOpen discussion area.Recent Images in Discussions


Mineral PhotographyPhotographing fluorescence

1st Dec 2014 23:01 UTCDennis McCoy

calcite with selenite (left) Dolomite psuedo of aragonite(upper right) and Calcite after glauberite.
Calcite from Mexico

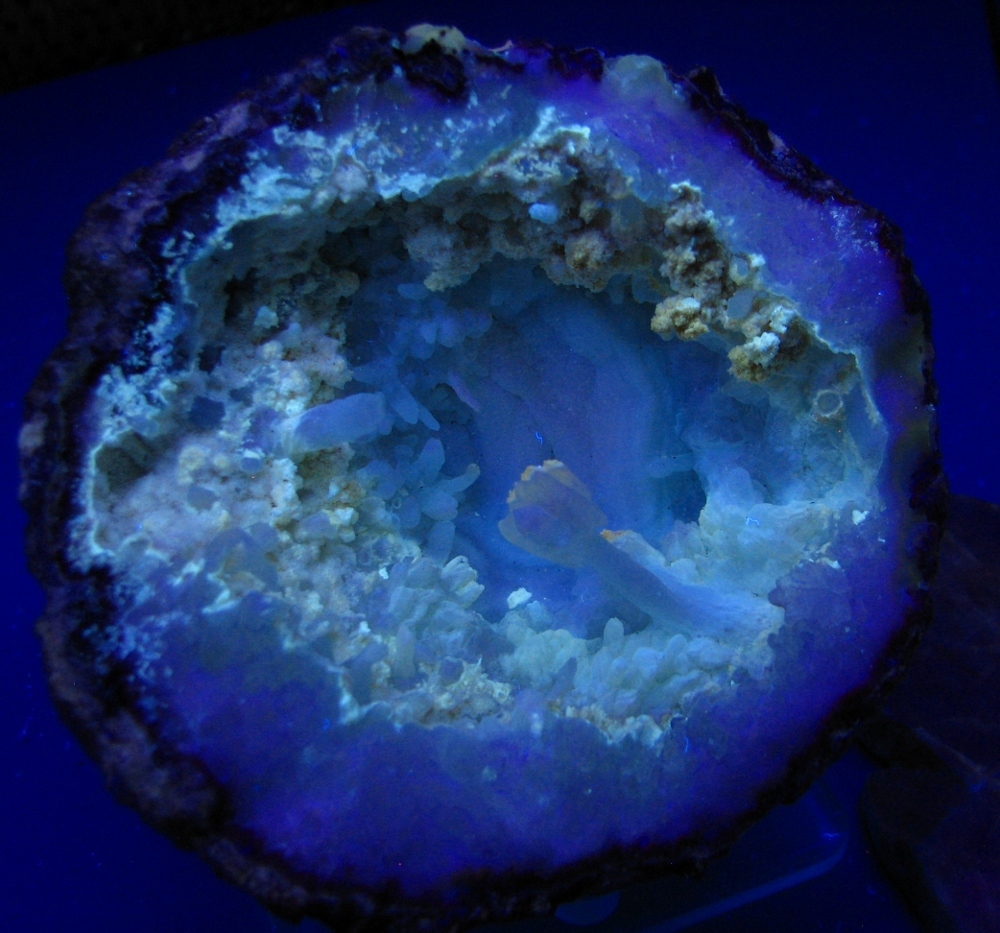
Quartz geode from Mexico with fluorescent mineral frosting.
2nd Dec 2014 01:18 UTCDoug Daniels
15th Dec 2014 00:42 UTCDennis McCoy

Now with a timed exposure I am getting better photos.
here is a group of fluorites.
Same shot with a red filter to kill the blue visible light, leaving only the fluorescence.

Still another fluorite with fluorescent calcite.

19th Dec 2014 18:13 UTCWaterDog

19th Dec 2014 18:49 UTCRonald J. Pellar Expert

19th Dec 2014 20:36 UTCHarold Moritz 🌟 Expert

20th Dec 2014 00:04 UTCChris Clemens Expert

There is some good info in the responses above. In my experience photographing fluorescent minerals, here are a few techniques that have worked for me:
1. A good tripod is mandatory. The camera needs to be rock-solid steady during the exposure to ensure maximum sharpness.
2. As Doug mentioned above, use a black background. A piece of black cloth, velvet, or felt works well.
3. Fill the image with your subject and minimize wasted background space. To do this, most specimens (especially smaller ones) will require the use of the macro setting (button with flower) on your camera.
4. Use a small lens aperture (high f number) and a longer shutter speed during your exposure. The small aperture will provide the greatest depth of field and sharpest image. I typically shoot at f 8 with an exposure time of around 3 seconds, but the best exposure will always be dependent on the intensity of the fluorescent response.
5. Brighter-fluorescing subjects will typically photograph better than dimmer-fluorescing specimens. With some dimmer-fluorescing pieces, you may end up photographing more blue lamp shine than actual fluorescent emission. This seems to be especially true for long wave specimens. Beware.
6. As Harold mentioned, Photoshop (or similar software) can be useful for correcting color balance and/or exposure if necessary. It is also useful for cleaning up the background of the photograph (removing fluorescent lint, dust specks, etc.).
I have attached an example of a recent photograph that I shot of a specimen of calcite, chondrodite, diopside and aragonite from the Long Lake Zinc Mine in Ontario, Canada. Illumination was provided by a 6 watt, short wave lamp (254nm), and the exposure was 3 seconds at f 4.6 at an ISO setting of 200.
Hope these tips help. I have found the photography of fluorescent minerals to be quite addictive!


版权所有© mindat.org1993年至2024年,除了规定的地方。 Mindat.org全赖于全球数千个以上成员和支持者们的参与。
隐私政策 - 条款和条款细则 - 联络我们 - Report a bug/vulnerability Current server date and time: 2024.4.26 21:04:48
隐私政策 - 条款和条款细则 - 联络我们 - Report a bug/vulnerability Current server date and time: 2024.4.26 21:04:48