登录注册
Quick Links : Mindat手册The Rock H. Currier Digital LibraryMindat Newsletter [Free Download]
主页关于 MindatMindat手册Mindat的历史版权Who We Are联系我们于 Mindat.org刊登广告
捐赠给 MindatCorporate Sponsorship赞助板页已赞助的板页在 Mindat刊登 广告的广告商于 Mindat.org刊登广告
Learning CenterWhat is a mineral?The most common minerals on earthInformation for EducatorsMindat ArticlesThe ElementsThe Rock H. Currier Digital LibraryGeologic Time
搜索矿物的性质搜索矿物的化学Advanced Locality Search随意显示任何一 种矿物Random Locality使用minID搜索邻近产地Search Articles搜索词汇表更多搜索选项
搜索:
矿物名称:
地区产地名称:
关键字:
 
Mindat手册添加新照片Rate Photos产区编辑报告Coordinate Completion Report添加词汇表项目
Mining Companies统计会员列表Mineral MuseumsClubs & Organizations矿物展及活动The Mindat目录表设备设置The Mineral Quiz
照片搜索Photo GalleriesSearch by Color今天最新的照片昨天最新的照片用户照片相集过去每日精选照片相集Photography

Creating mineral bases using Fimo Clay

Last Updated: 26th Apr 2011

By Jolyon Ralph

Creating mineral bases using Fimo Clay


Some minerals are difficult to display without a custom base. There are many people providing custom bases, but for those on a limited budget (or who enjoy being creative), you can make your own using Fimo modelling clay).

Fimo clay is simple to work with, inexpensive and can be fired in a domestic oven for 30 minutes at a relatively low temperature. Crucially it does not shrink when heated, so you can create a base, fire it, and it will be a perfect fit for your specimen.

So.. Here is my first attempt at making a base. It took me a total time of about 45 minutes.

1. Break off a piece of the clay. I'm using a glazed bathroom tile to work the clay on - this is ideal because it can go straight into the oven on this tile.

07458970014948043015829.jpg
Break off some clay


2. Knead the clay to soften it.

06831140014947338889919.jpg
Kneading the clay is essential.


3. Roll out the clay. Keep kneeding and rolling the clay until it is elastic.

02132150014947187128293.jpg
Rolling the clay.


4. Push the clay into a lump

07844510014947929161872.jpg
Creating a mineral base using Fimo clay


5. Push your specimen into the lump of clay. Adjust the clay so it can properly hold the specimen, but you must be able to remove and insert the specimen again!

00050200014948043025846.jpg
This specimen is a native copper from Dzhezkazgan, Kazakhstan


6. Bake the base on the tile (without your specimen!) for 30 minutes at 110 degrees Celsius (230 degrees F). When it comes out, leave it to cool for 20 minutes.

02169470014948043022661.jpg
It looks the same after baking, as it should!


7. Test your specimen in the base - it should fit perfectly!

04202960014948043022980.jpg
Yes, it fits


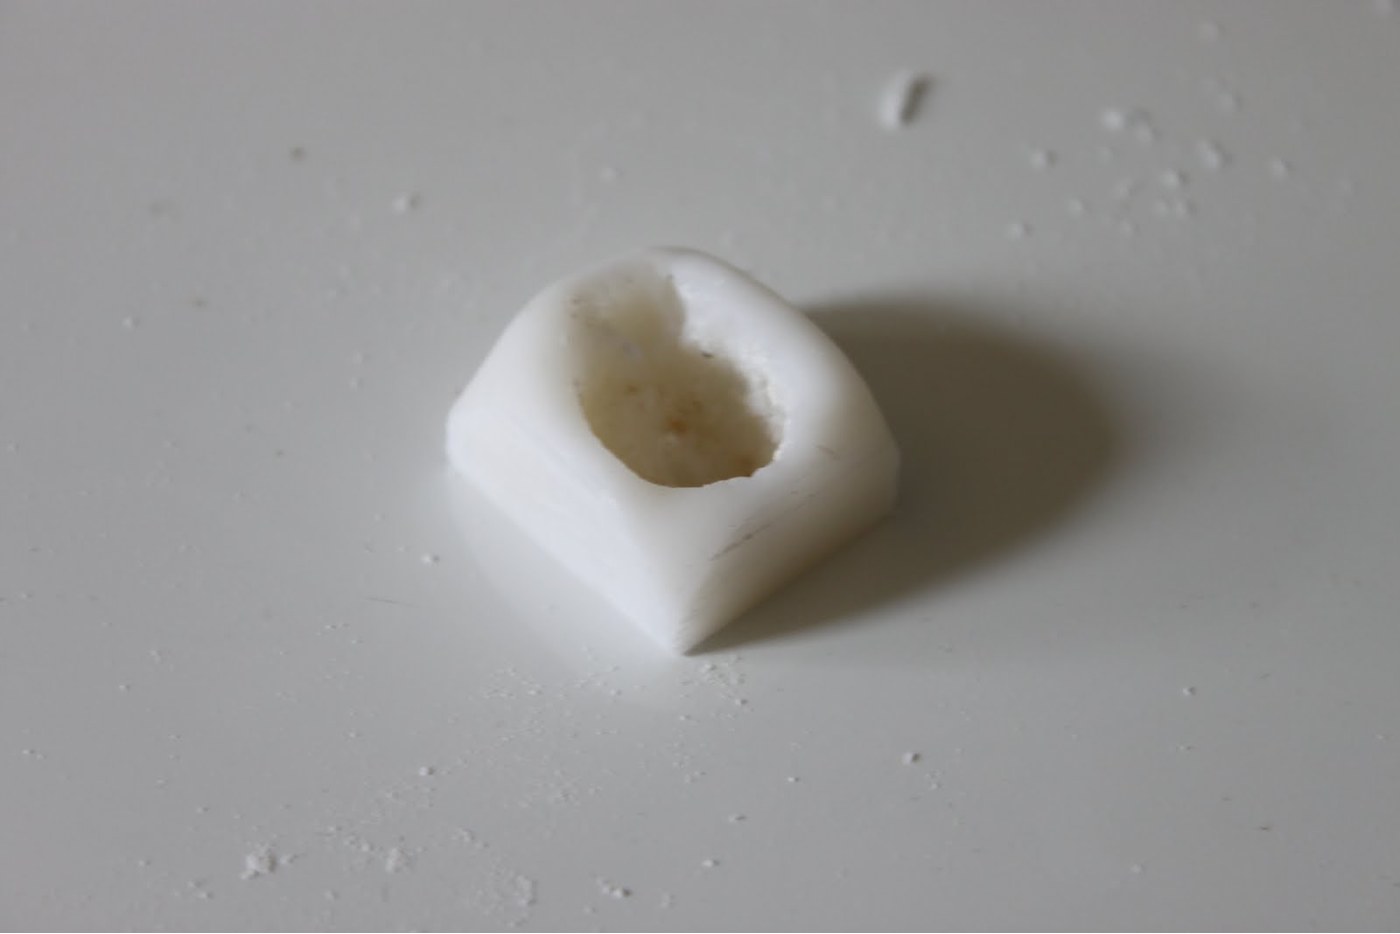
8. If you want a neater base, you can trim down the baked clay, it's not hard to work with. You'll need to judge how much you should leave to securely keep the specimen stable. I just used a normal kitchen knife to cut through the clay. it has a consistency more like a hard plastic than baked clay.

04069600014946496831762.jpg
But it's still a bit ugly...


9. You can sand down the sides if you want it to be nicer. I could trim down the top and sand that down too, but I am uncertain how much stability would remain if I did this.

06520100014948043027329.jpg
Sanding down the sides.


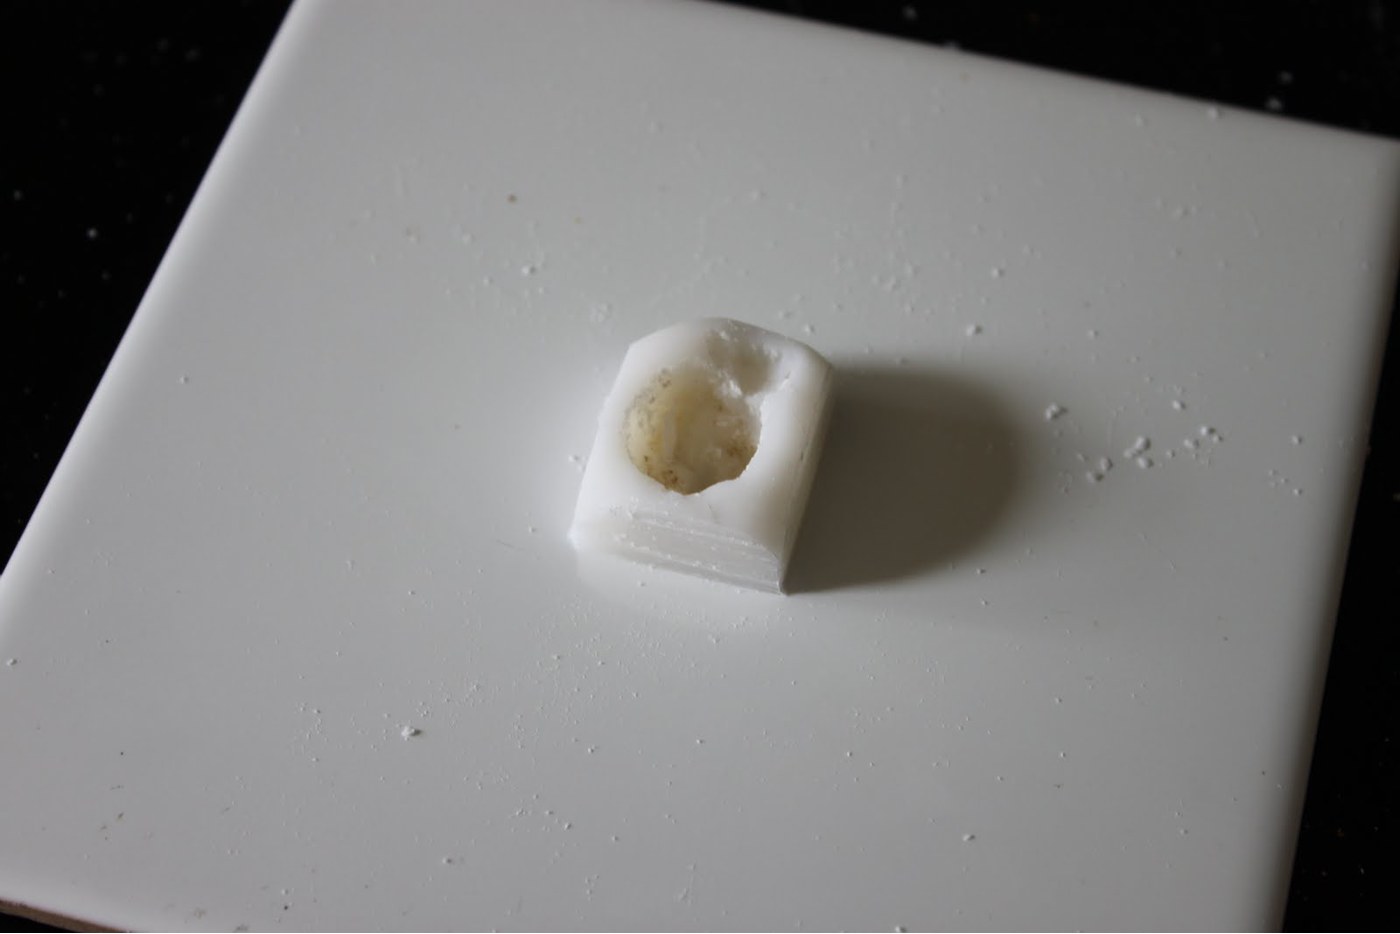
10. The finished base.

08707940014948043023173.jpg
Finished!


11. Testing the specimen again. It doesn't fall over, I haven't trimmed too much!

00830150014948043035467.jpg
Testing


12. And into the cabinet it goes.

Now. this is my first attempt, and with more experience and more patience I think it would be possible to use less clay and make less obtrusive bases than this - but it works fine and keeps the specimen safe.

02965550014948043032287.jpg
In the cabinet


Hope you enjoyed this!

Fimo clay is available in many places, but in the UK you can buy it mail-order from EJR Beads http://www.ejrbeads.co.uk - which is run by my sister (who is somewhat of an expert on Polymer Clay having written two books about it!) You'll want the 'Fimo Classic' blocks, which are available here: http://www.ejrbeads.co.uk/shop/index.php?main_page=product_info&cPath=17_40&products_id=149 - I used the "00 Translucent" for this experiment - as you can see it's not VERY translucent, I have also got a block of white clay to try, but you can choose the colours that you feel are appropriate for your specimens.

Jolyon


Article has been viewed at least 16191 times.

Discuss this Article

26th Apr 2011 15:04 UTCFrank de Wit Manager

Interesting! Thanks :)F

26th Apr 2011 17:43 UTCMatt Neuzil Expert

another brand of similar clay is Sculpey brand. depending where you buy it and how much you think you will use there are larger packages available.

26th Apr 2011 19:07 UTCJolyon Ralph Founder

Yes. My sister (who is the expert in all these things) claims Fimo is beter than Sculpey, but I suspect there's not much to choose between them when making mineral bases. You can easily make four or five bases out of a single block which costs about $2.50.

Jolyon

26th Apr 2011 19:29 UTCAlfredo Petrov Manager

Thanks, Jolyon. Very useful article!

27th Apr 2011 02:56 UTCScott Sadlocha

Thanks for the info Jolyon. I recall seeing something similar from an old issue of MinRec, but it was a bit more complicated than your technique. This looks like it could work out quite nicely. Up until now I have been using clear acrylic squares with mineral tack or earthquake gel, but I like the idea of the custom fit on these. I have to look into where I could find something like this here in the US. Craft store perhaps?

28th Apr 2011 13:54 UTCDavid Von Bargen Manager

Yes, craft or art supply stores are the place to find it. A small bead of mineral tack can help hold the mineral in place. If you need a bit more stability, you can mount this base on another base with double sided cellophane tape.

25th Jul 2011 19:23 UTCJames Pool

Just a note to let people know that currently Michael's (an arts and craft store chain in the USA) has a 50 percent off sale on 2 oz blocks of plastic polymer clay for all of the makers they stock. This includes Fimo, Sculpy and what appears to be the store brand Craft Smart. I bought 4 blocks each of the black and white colors of the Craft Smart brand as they were at least 50 percent cheaper than the other brands.

I figure that I would choose a color for the best contrast, hence the black and white colors. I figure for example a bright orange mineral would best be displayed on a black base especially if it has no matrix. Clear minerals are a bit tricker as I guess I will just have to see what looks best for a very nice terminated bicolor Tarryall topaz crystal that I found at Joe Dorris' Topaz Mountain claim during a club trip.

3rd May 2012 08:58 UTCJason Evans

Great idea! I like how the specimen can easily be removed, without leaving sticky bits of tack stuck to it and risking damage to more fragile specimens as happened to me once before with a brand new specimen, I went to lift it of the tack so i could examine it and it just came apart, also i hate the smell of blue tack, I dont know where to get mineral tack from and i dont know if that has a smell either.

21st Aug 2012 16:17 UTCValere Berlage

Interesting, Especially that I do not know professionnal base making at the doorstep.
For larger speciments requiring an heavier and larger base, is the cooking as easy, without cracks?
Since that stuff is not so cheap, does anybody know in which kind of store to find this in large quantity and black color in Belgium (or France, Netherlands or Luxemburg), I guess it would be cheaper than a mail order.
Many thanks
Valère, Belgium

7th Apr 2018 22:15 UTCMichael Shih

Hi Jolyon,

I am interested in using FIMO in making mineral bases. I am concerned about copper minerals tarnishing as I heard FIMO can release HCl. I noticed you made a base for a copper piece. Has it tarnished at all near the base? Does anyone know if Mineral tack also increases tarnishing in copper minerals?

Thanks, Mike
 
矿物 and/or 产地  
Mindat Discussions Facebook Logo Instagram Logo Discord Logo
版权所有© mindat.org1993年至2024年,除了规定的地方。 Mindat.org全赖于全球数千个以上成员和支持者们的参与。
隐私政策 - 条款和条款细则 - 联络我们 - Report a bug/vulnerability Current server date and time: 2024.4.25 07:28:43
Go to top of page